Clippings is a Firefox add-on that can store the text from web pages as clippings that can be reused later. Also, it can create templates of text that also can be used in different web elements like emails, forums, and online forms. It saves time and you can copy-paste and insert text with just a couple of clicks with this add-on.
Download and install it from here.
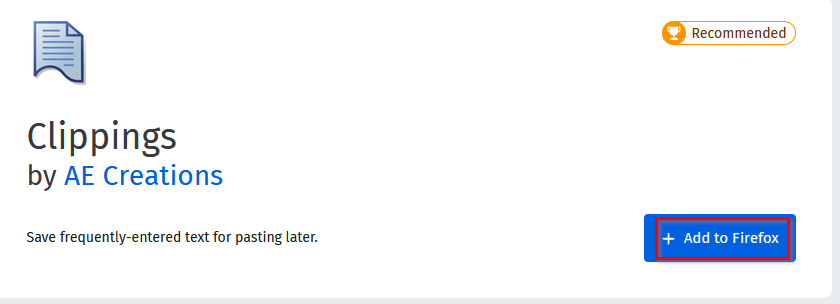
After it is installed, an icon for Clippings will show up next to the Firefox address bar.
![]()
Clicking on it opens the Clippings Manager.
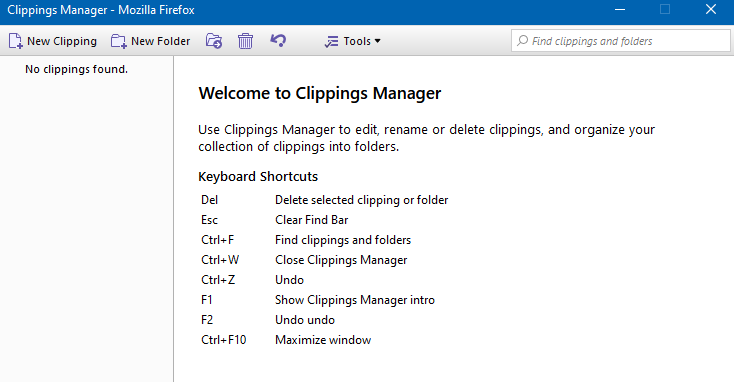
Also, a brief walkthrough on how to use will be shown.
Create clippings:
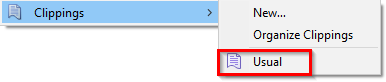
To create a clipping, highlight the text to be saved from the web page and right-click. Then choose Clippings >New.

This will open the Clippings Manager window. Name the clipping as needed.
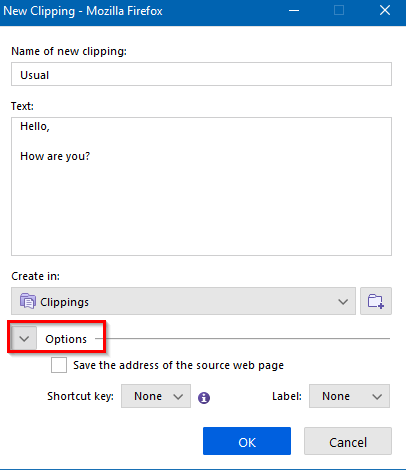
Also, click on the Options button to save the source URL of the web page from where the text was saved. You can also assign a keyboard shortcut for this clipping and also label it with different colors.
Insert clippings:
To insert an existing clipping to an email, a text area in a web page or a form, right-click there and choose the clipping from the Clippings menu.
The list of all the saved clippings will be available to choose from.
Use placeholders in clippings:
Clippings also has a useful feature of creating placeholders. So, say if you want to make a text template for replying to emails, you can do so with this. These are variables to which you can add values within the clippings.
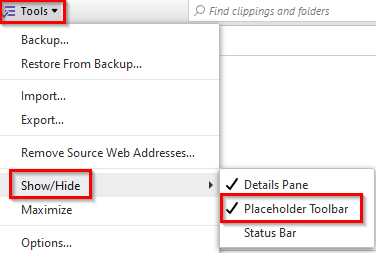
To use it, first enable the placeholder view from the Clippings Manager window. This is by selecting Tools > Show/Hide > Placeholder Toolbar.
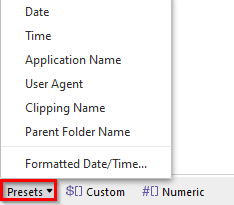
Once enabled, there will be various placeholder options to choose from.
![]()
You can directly insert from a preset list of placeholders and also add your own.
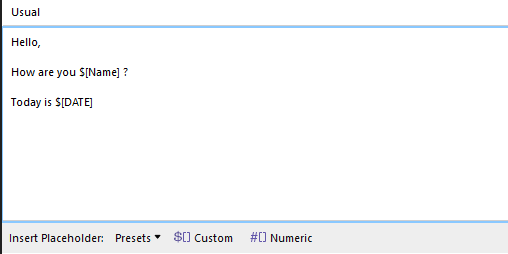
Suppose, to add a placeholder that prompts for a username when replying to emails, choose Custom and name the placeholder.
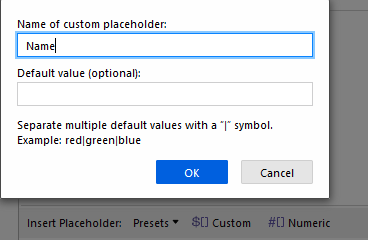
As a prompt would be needed to use a different name in this example, the default value is left blank. This clipping template will also display the current date whenever it is used. So, the Date preset is also added to it.
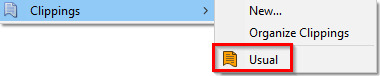
The clipping with the placeholders is saved and ready to use. Insert it as before by right-clicking in the text area and choosing Clippings.
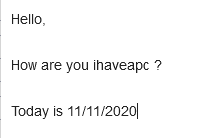
Now, whenever it is inserted, first a prompt to enter the username will be asked.

Then the rest of the text will be pasted automatically along with the Date placeholder to show the current date.
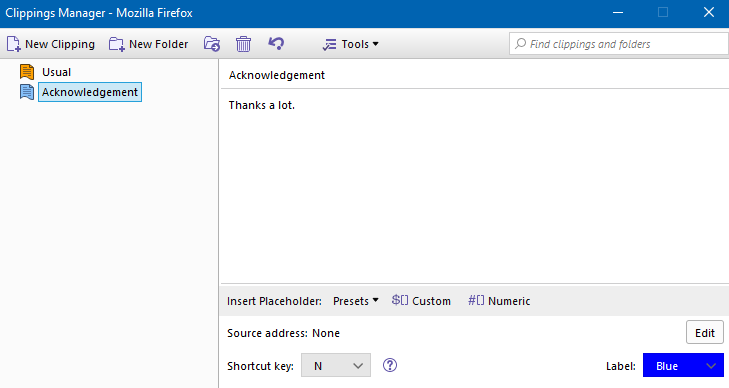
So you can create various such templates with the Clippings add-on each for different uses like default reply message, acknowledgment message, and so on.
Pretty cool.
Manage clippings:
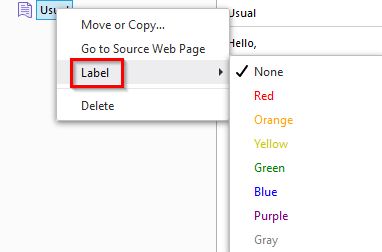
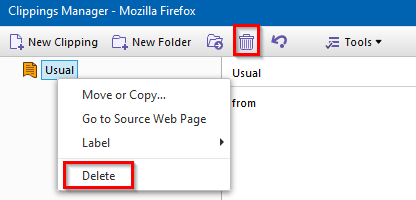
All the added clippings can be managed by the Clippings Manager. You can color-code clippings by right-clicking and selecting Label.
To delete a clipping, right-click and delete it or select it and click on the Trash icon.
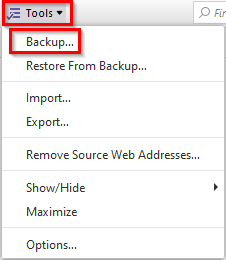
Backup and restore clippings:
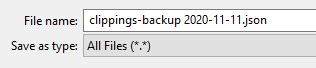
All the added clippings can be directly saved as a local file from the Clippings Manager. Click on Tools and select Backup from the drop-down menu.
The backup will be saved locally as a JSON file.
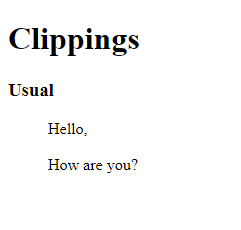
To save them as an HTML file, select Export from the Tools drop-down menu. Then select HTML document. You can save them as a CSV file too along with other types.
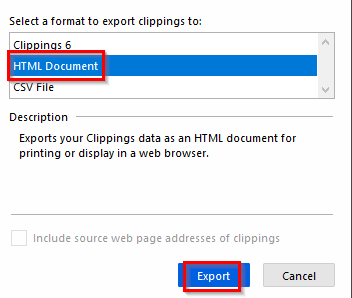
You can then view all the saved clippings in the browser.
Options:
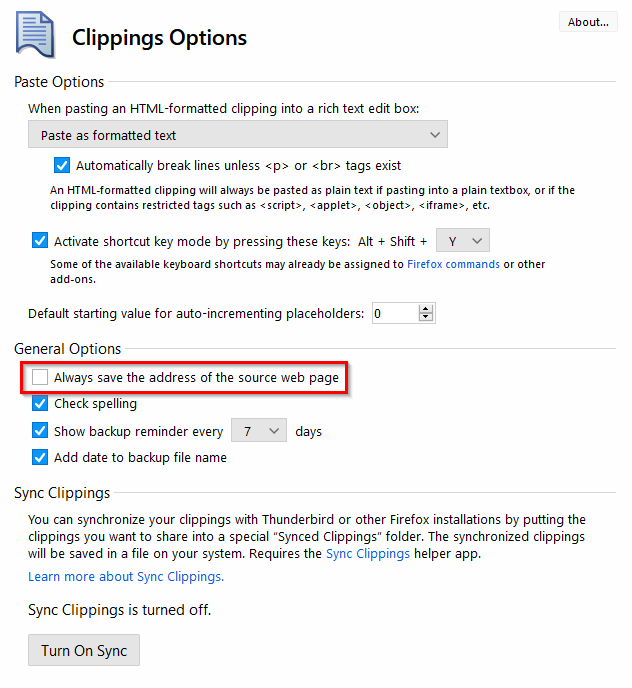
To configure various options, click on Tools and choose Options from Clippings Manager.

A useful option to enable here can be to automatically save the web address of the pages from where clippings were added. This is turned off by default and can be enabled from here.
This is a handy add-on to organize text clippings and also for creating various templates.
Do try it out.