Snap feature in Windows 10 is useful to maximize screen space by tiling and arranging open windows. It can, however, be disabled or configured further.
Here is how:
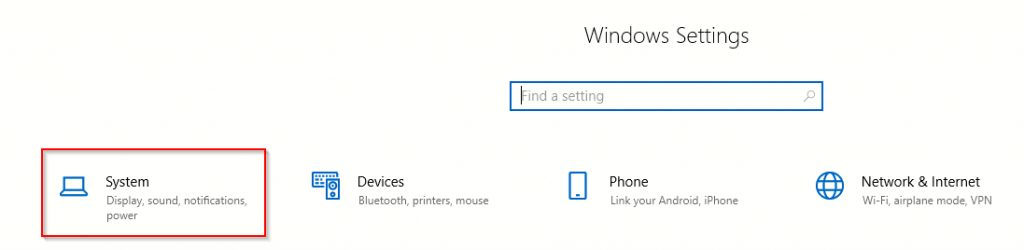
Access Windows Settings (shortcut keys: Win key + I) and choose System.
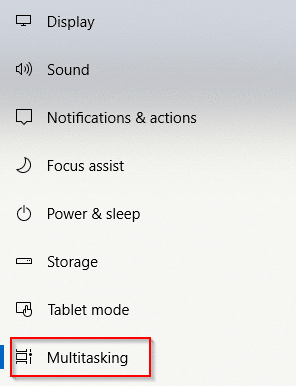
Then go to Multitasking and from the section of Work with multiple windows, change the Snap settings.
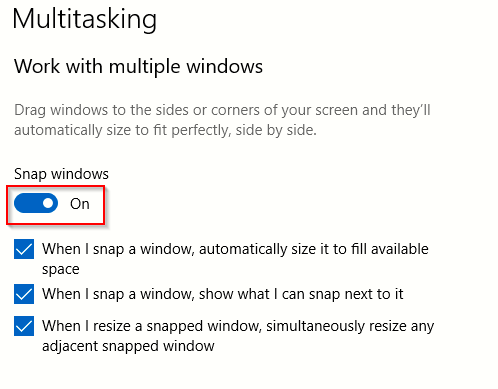
To disable it completely, turn off the option of Snap windows. To stop the snapped window from automatically being resized to fill the available screen space, disable that option. You can also turn off the Snap Assist feature and auto-resizing of any other adjacent window next to it.
Besides that, if you use virtual desktops in Windows 10 (here is how to add them) and want to keep track of open windows in various virtual desktops, scroll down to Virtual Desktops.
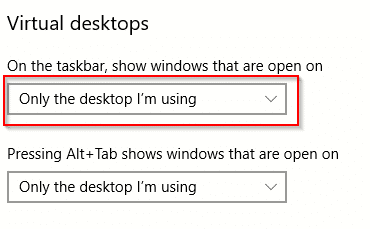
Over here, to display open windows from all the active virtual desktops, select All desktops.
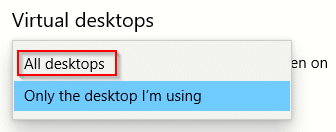
This will then show the open windows from various virtual desktops onto the Taskbar. Clicking any of those windows will directly bring you back to that virtual desktop.
Similarly, you can configure the shortcut key Alt + Tab to display all open windows across different virtual desktops instead of those from the current desktop.
All done.