One of the earlier posts explained how to take screenshots in VLC player.
Now to do the same automatically :
1.Open VLC player and go to Tools > Preferences.

2. At the bottom left of column, select “All” from “Settings”.

3. Drill down to Video > Output Modules > Scene Filter, check that “Recording ratio” is set to 50 or any smaller number, also if desired, enter the “Filename prefix” value.
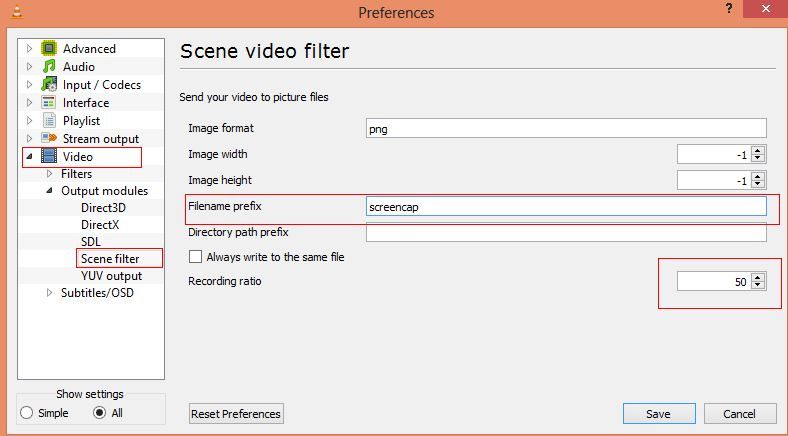
This is how the screenshots will be named (say screencap01, screencap02 and so on if the prefix is screencap). The recording ratio will determine how many screenshots be captured, and for a full movie or a long video, these add up to a lot.
4. Â Save the changes.
5. Now, to start the auto capture of any movie or video file, first open Windows command prompt as Administrator (run as Administrator), then change the directory to C:\Program Files\VideoLAN\VLC :
6. Then type :

6. This will launch VLC player, now open the desired video file for playing. At this point, VLC player will not display the video but the screenshots are automatically getting captured in the default directory (Users\username\My Pictures).

Cheers.