ReadyBoost feature in Windows 7 makes it possible to use plugged in USB flash drives as a temporary storage space thereby freeing up the system memory. It does this by borrowing the reserved space set from the plugged in USB drive and using it as temporary storage when the physical system memory starts running low.
To enable ReadyBoost :
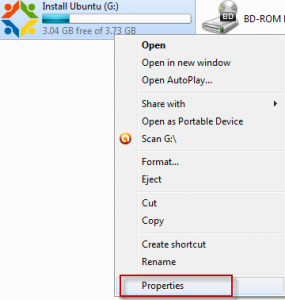
1. Plug in a USB drive and right click, then select Properties.
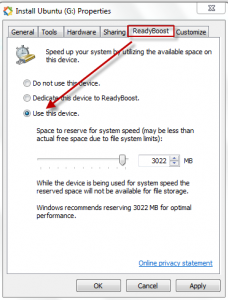
2. Click the ReadyBoost tab and select the option of “Use this device”. It is best to let Windows set the recommended space that is to be used as reserved for ReadyBoost.
All done.
From now on when the system memory starts running low, the reserved space from the USB drive will be used thereby increasing the system performance. (One thing to note is that as long as the space from the drive is used for ReadyBoost, that same space can’t be used for storing data on it so there is a trade-off).
By the way, in Windows 7, upto eight USB drives with a maximum of total 256 GB of extra memory can be supported using ReadyBoost which is really cool.

