Setting up a test website on a local system is a great way to test for new changes and possible errors before finally implementing the changes.
This is even true if you have a WordPress blog and want to make some changes, best bet would be to first make these changes in a sandbox environment before changing the live blog.
This is a two part series which will show how to setup a WordPress blog/site locally on a Linux Mint system for development and testing purposes.
Here is what is needed first :
A LAMP package (apache, php and mysql installed and running on Mint). If not installed, this post should set you up and running with a complete web server package called XAMPP.
Basically, the process of WordPress installation can be divided into two parts :
1. Creating a wordpress database and an associated wordpress user
2. Installing wordpress in the webroot directory
This part covers the first point.
Creating a WordPress database and an associated user :
Once XAMPP is up and running, we will need to setup a mysql database and a user before installing wordpress.
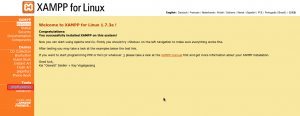
To do this, go to http://localhost and click on phpMyAdmin on the left side under Tools section.
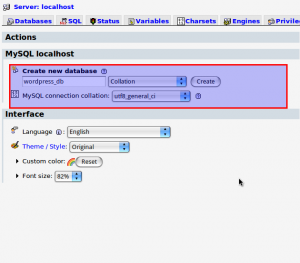
Enter a database name (wordpress_db) under the MySQL localhost section, keep other settings intact and click the Create button.
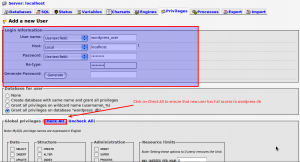
Once created, select the new database wordpress_db, then click on the Privileges link and click on Add user which is at the bottom as shown by the arrow. (You can go to the main phpMyAdmin page by clicking the phpMyAdmin logo on top left during the process in order to go back and make new users, check privileges and so on).
In the Add New User section as shown below, enter the user name as wordpress_user, host as localhost and a password twice.Remember this password as we will be needing it during installation of WordPress later.
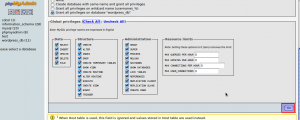
Also make sure to give full access to wordpress_db using the “Grant all privileges on database wordpress_db” option and then clicking Check All link in Global privileges section as shown below.
Finally, hit the Go button at the bottom which should create the new user with given rights.
Verify that the new user created has full rights on wordpress_db by clicking on Privileges link, the associated rights should show up in the column as follows.
This takes care of the initial phase for installing WordPress, what we did was :
- Make a new clean database for WordPress
- Make a new user and assign rights to that user for accessing the WordPress database created.
Part 2 will be the heart of the whole process and definitely less boring 🙂 as we will actually install WordPress and make sure it is up and running.
Stay tuned for Part 2.


My Status in Xampp is
MySQL database DEACTIVATED
PHP ACTIVATED
Perl ACTIVATED
Common Gateway Interface (CGI) ACTIVATED
Server Side Includes (SSI) ACTIVATED
PHP extension »eAccelerator« DEACTIVATED see FAQ
PHP extension »OCI8/Oracle« DEACTIVATED see FAQ
Jeff – Did you set a root password for phpmyadmin from security page?
I set some passwords for something from the terminal window when I installed. but can not set a password from the ‘security page’ of phpmyadmin. That is were it says :
Welcome to phpMyAdmin
Error
MySQL said: Documentation
#2002 – The server is not responding (or the local MySQL server’s socket is not correctly configured)
Connection for controluser as defined in your configuration failed.
Ok, I am sorry, I am new to Linux. Now I have my Xampp up and running, I started to create the database as prescribed in the blog and got this.
MySQL said: Documentation
#2002 – The server is not responding (or the local MySQL server’s socket is not correctly configured)
Connection for controluser as defined in your configuration failed.
Now what?
Jeff – Which version of XAMPP are you using?
This is a known issue with XAMPP versions below 1.74, your best bet is to install the latest XAMPP version which is 1.7.4.
Else the workaround is to edit mysql.php file in /opt/lampp/htdocs/xampp and replace its contents.
Download that file from here and copy it’s contents to mysql.php.
The version I started with is the link off of your blog. ” XAMPP for Linux 1.7.4 “