How To Surf The Internet Faster Using OpenDNS
OpenDNS provides fast and free DNS servers which can speed up Internet surfing experience if you often have to face delays while loading webpages.
To change the current network settings of your Windows or Linux system from DNS servers provided by ISP to OpenDNS :
For Windows 10 (Updated Aug 2020):
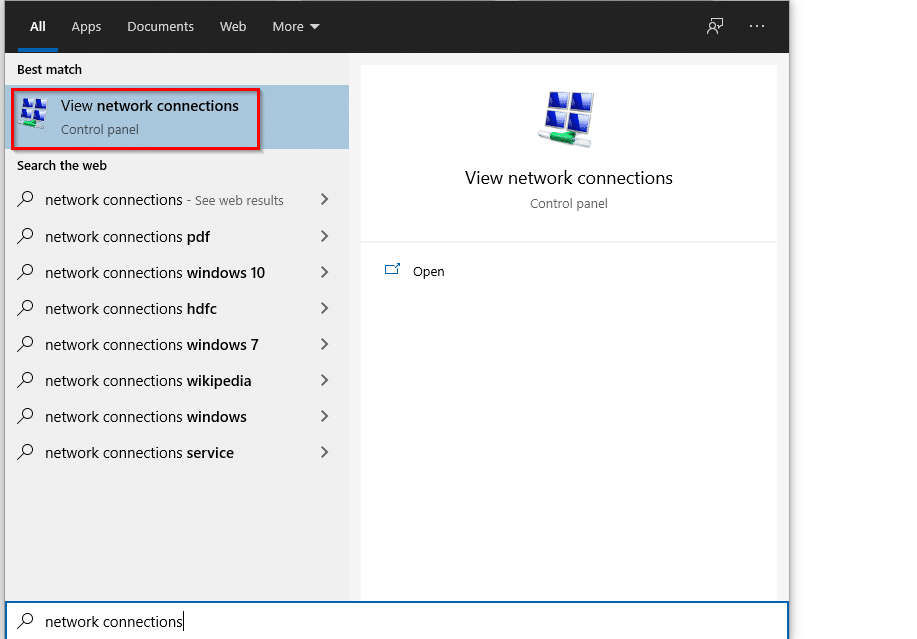
Open the search box (Win key + S) and type in “network connections”. Then click on View network connections.
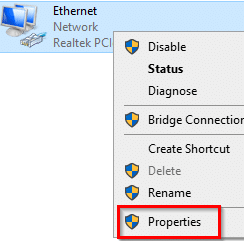
Right-click on the network adapter and select Properties.
Select Internet Protocol Version 4 and click Properties.

Select Use the following DNS server addresses and enter the IP addresses 208.67.220.220 and 208.67.222.222 for OpenDNS.
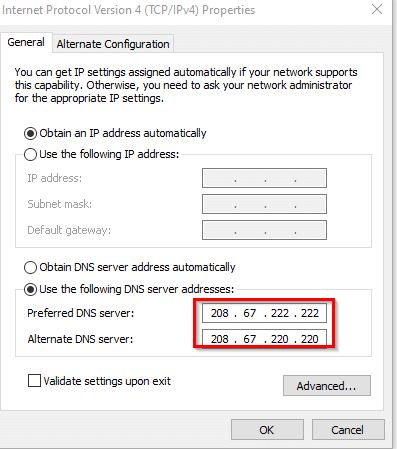
Click OK to save the changes.
For Windows (7/Vista/XP) :
[This example uses Windows 7].
1. Open Control Panel > Network and sharing center and click on “Change adapter settings” .

2. Right click on the network adapter active and select Properties.

3. Left click on “Internet Protocol Version 4 (TCP/IPv4) and select Properties.

4. Under the General tab, select “Use the following DNS server addresses” and enter the following OpenDNS server IP addresses :
208.67.220.220 and 208.67.222.222

5. Click Ok for the changes to take place.
[For doing the above in Windows XP type “ncpa.cpl” from Start > Run and for Vista or even Windows 7, simply type “ncpa.cpl” from search box after clicking the Windows orb and follow the steps 2 to 5 from above.]
For Linux Mint / Ubuntu :
[This example uses Linux Mint 12].
1. Open Control Center and select Network Connections.


2. Choose the active connection and hit Edit.

3. Click on IPv4 settings and enter the OpenDNS server IP addresses 208.67.220.220 and 208.67.222.222 separated by a comma in the DNS servers field. [If the ISP assigns DHCP based addresses, change the method from “Automatic (DHCP)” to “Automatic (DHCP) addresses only” for enabling the box where the DNS addresses need to be entered as shown below.] Hit Save for changes to take place.

All done.
Happy surfing!

How To Easily Backup Data Online Using AngryFile

How To Make And Remove App Tabs In Mozilla Firefox

A good clear article however it might be worth mentioning one point: This tip is good for speeding up your internet access if your normal DNS servers are slow however in some cases it can slow things down.
For example if you are loading media from somewhere that has web servers all over the world to spread the load (eg youtube). Using your original DNS server would give you the content server closest to you (eg you are in the UK with a UK ISP you are likely to connect to the closest youtube server to the UK).
However if you are using OpenDNS you would probably connect to the closest youtube server to the OpenDNS dns server. If OpenDNS is based in America then you might get a faster connection to YouTube but connect to an American YouTube server and the video would stream all the way over the Atlantic to reach you and therefore download slower.
Note: I have no idea where OpenDNS/YouTube servers are based so treat services as examples only – the same principle applies to any web site using a CDN.
That said OpenDNS is a fantastic service so if you have very poor DNS servers you will probably be better off but not in all cases.
Hi Neal,
Valid points!
However, the OpenDNS architecture for premium DNS connects the client to the nearest datacenter in the region and from there DNS requests are handled which actually speeds up connectivity. Premium DNS is free by the way.
What a wonderful how-to article for setting up OpenDNS on a PC. We shared this from the OpenDNS Facebook page and many of our users shared it, too. Love the screen shots! If there’s ever anything you need from OpenDNS, even just some stickers, feel free to drop me a note.
Erin
OpenDNS Community Team
Hey Erin,
Glad you liked it. OpenDNS is a wonderful service after all!
Cheers.
OpenDNS is very reliable. I’ve used it for years, and have recommended to others (including my parents)
Does doing this not make you more vulnerable to viruses?
Hi Paul,
Just the reverse. Regular ISP DNS can often not detect phishing sites but OpenDNS has a huge database of sites that are legit and those not which it can cross check and warn before hand.